
Are you struggling with hard water problems in your home? The secret to smooth, spot-free water might lie in your water softener float setting.
Getting this setting right can save you from costly repairs, improve water quality, and extend your system’s life. You’ll discover simple steps to adjust your water softener float, why it matters, and how it can make a big difference in your daily water use.
Keep reading to unlock easy tips that anyone can follow for softer, cleaner water every day.
Credit: www.youtube.com
Why Float Setting Matters
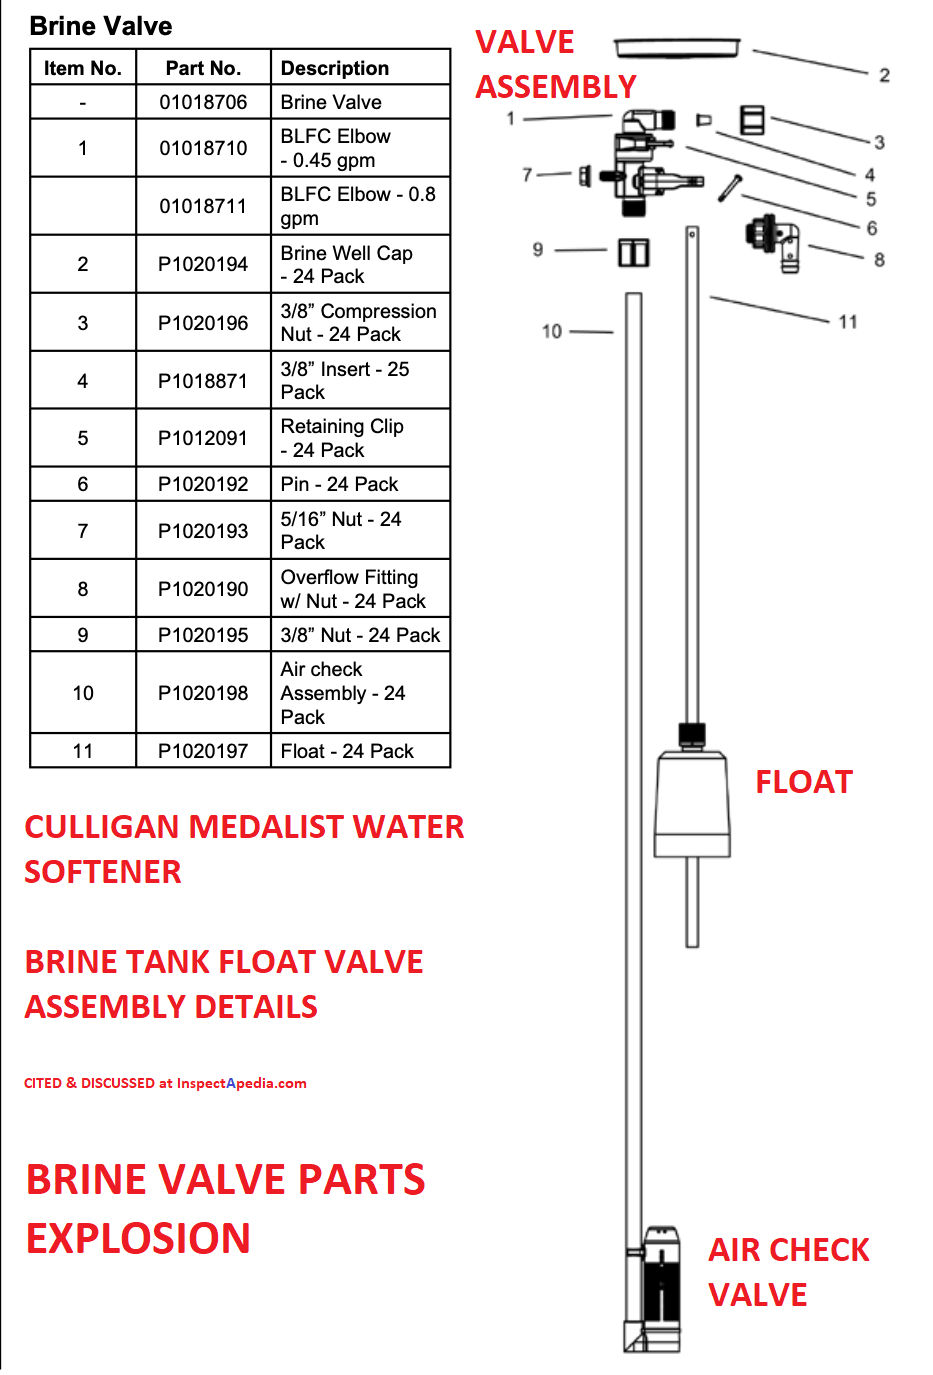
The float setting in a water softener controls the water level inside the brine tank. It affects how well the softener works and how long it lasts. A correct float setting keeps the right amount of water for the salt to dissolve. This process is key for soft water and smooth system operation.
Wrong float settings cause many problems. Understanding why float setting matters helps keep your water softener in good shape. This saves money and avoids repairs.
Impact On Water Softening
The float controls water flow into the brine tank. Too much water dilutes the salt, lowering softening power. Too little water stops proper salt dissolving. This means hard water enters your home.
Proper float setting ensures the right salt concentration. It helps the resin beads remove minerals from water. Good softening means better water quality and less scale build-up.
Common Problems From Misalignment
Misaligned floats cause overflows or dry tanks. Overflow leads to water waste and salt loss. A dry tank stops the salt from dissolving fully.
Both issues cause poor water softening. They may also damage the softener parts. Regular checks and adjustments fix these problems early.
Credit: inspectapedia.com
Types Of Water Softener Floats
Water softener floats control water levels inside the tank. Different float types work in unique ways. Knowing these types helps choose the right float. Each has its own design and use.
Ball Float
The ball float is a simple, round device. It floats on the water surface. When water rises, the ball rises too. This movement controls a valve to stop water flow. It is common and easy to maintain. Ball floats work well in many softeners.
Piston Float
Piston floats use a small cylinder or piston. The piston moves up and down with water level. This movement opens or closes the water valve. Piston floats offer precise control of water levels. They suit softeners needing accurate adjustments.
Other Variations
Some softeners use different float types. These include diaphragm floats and electronic sensors. Diaphragm floats flex with water pressure. Electronic sensors detect water levels without moving parts. Each type fits specific softener models and needs.
Tools Needed For Adjustment
Adjusting the float setting in a water softener requires specific tools. Having the right tools makes the job easier and faster. It helps ensure accurate and safe adjustments. Preparing your tools before starting saves time and avoids frustration.
Basic Tools List
You will need a small flathead screwdriver for turning screws. A pair of pliers helps to grip and move parts carefully. A flashlight can brighten dark areas inside the softener unit. A clean cloth is useful for wiping dust and moisture. Some models may need an adjustable wrench for loosening nuts.
Safety Precautions
Always turn off the water supply before adjusting the float. Unplug the softener from the power source to avoid shocks. Wear gloves to protect your hands from sharp edges. Work in a dry area to prevent slipping and accidents. Read the manual to understand the specific safety tips for your model.
Step-by-step Adjustment Guide
Adjusting the water softener float setting can improve your system’s performance. This guide helps you change the float height correctly. Follow the simple steps below to ensure your water softener works well.
Locating The Float
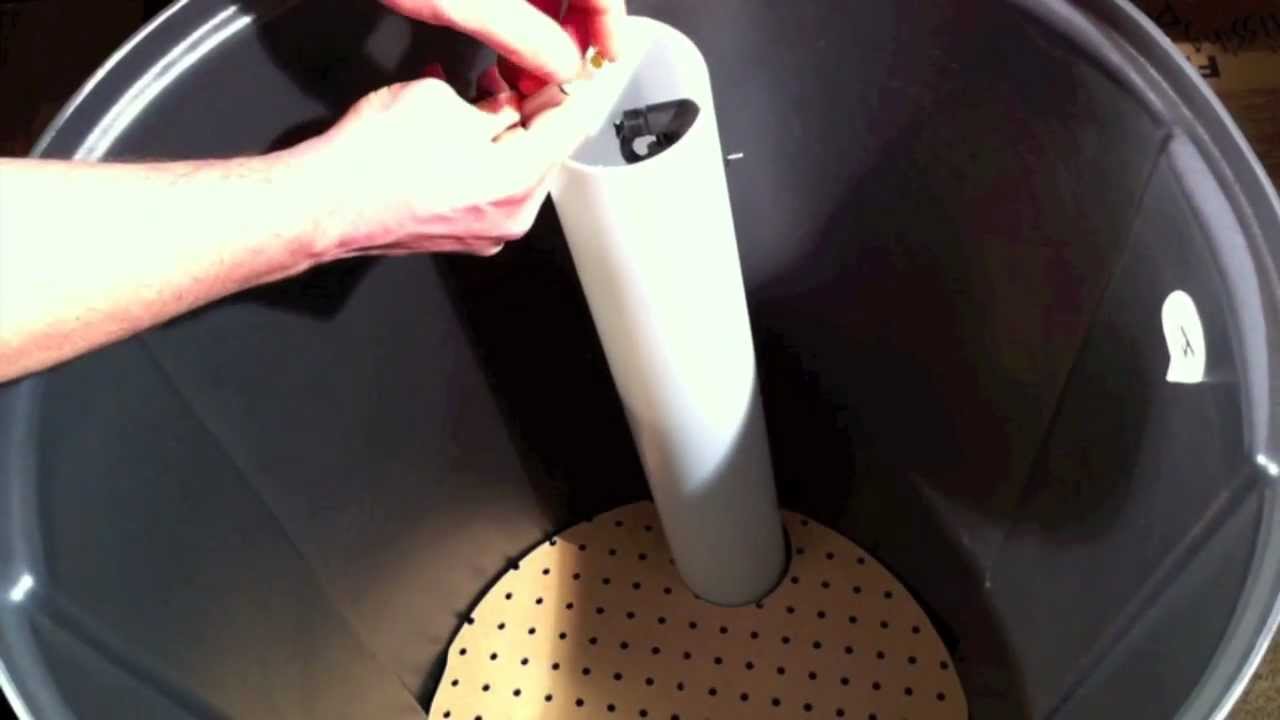
First, find the float inside the brine tank. It looks like a small plastic ball or cylinder. The float controls the water level during regeneration. Check the tank lid to open it carefully. Look inside for the float near the water inlet pipe.
Measuring The Current Setting
Use a ruler or tape measure to check the float’s height. Measure from the bottom of the tank to the float top. Write down this number. This helps track changes and returns to the original setting if needed.
Adjusting The Float Height
To raise or lower the float, gently move it along its rod or adjust the clip. Moving the float up raises the water level. Moving it down lowers the water level. Make small changes to avoid overfilling or low water.
Testing The New Setting
After adjusting, run a manual regeneration cycle. Watch the water level inside the tank. Check if the water stops at the new float height. Adjust again if the water level is too high or low. Repeat until the setting works well.
Signs Your Float Needs Adjustment
The float inside your water softener plays a key role in its operation. It controls the water level during the regeneration cycle. Sometimes, the float setting may go off. This can cause several problems with your softener’s performance. Spotting these signs early helps avoid bigger issues and costly repairs.
Overflow Issues
One clear sign of float problems is water overflow. The float may be set too high, letting too much water fill the tank. This causes water to spill out. Overflow leads to water damage and waste. It also means the softener is not working properly.
Inefficient Softening
Your water may feel hard even after softening. This means the float setting might be wrong. If the water level is too low, the resin beads do not regenerate fully. The softener then fails to remove minerals. Adjusting the float can fix this and improve water quality.
Unusual Noises
Strange sounds during the softening cycle can signal float issues. Gurgling or banging noises happen when water flow is irregular. A wrong float position disrupts the cycle and causes these sounds. Checking and adjusting the float can stop the noise and restore smooth operation.
Credit: kenmorewatersolutions.zendesk.com
Maintenance Tips For Float Longevity
Proper maintenance of your water softener float ensures it works well for a long time. The float controls water levels and helps the system function smoothly. Regular care prevents issues and saves you repair costs. Follow these simple tips to keep the float in good shape.
Regular Cleaning
Clean the float regularly to remove dirt and mineral buildup. Use a soft cloth and mild soap with water. Avoid harsh chemicals that can damage the float. Rinse thoroughly and dry before placing it back. Clean floats move freely and measure water levels correctly.
Checking For Wear And Tear
Inspect the float for cracks or holes. Look for signs of damage around the stem or valve. Worn floats can cause leaks or incorrect water levels. Check the float every few months to catch problems early. Replace or fix parts showing wear to avoid bigger issues.
When To Replace The Float
Replace the float if it no longer floats or moves properly. A damaged float affects the whole water softener system. If cleaning and repairs do not help, it is time for a new float. Use the correct size and type to ensure proper function. Timely replacement keeps your water softener working well.
Frequently Asked Questions
What Is A Water Softener Float Setting?
A water softener float setting controls the brine tank’s water level. It ensures the right salt-to-water ratio for efficient softening. Proper float adjustment prevents overflow and maintains system performance.
How To Adjust Water Softener Float Setting?
To adjust, locate the float inside the brine tank. Gently move it up or down to change water level. Follow your model’s manual for precise instructions and avoid damage.
Why Is Water Softener Float Setting Important?
Correct float setting prevents salt wastage and water overflow. It maintains optimal regeneration cycles and protects your softener from damage. This saves money and extends system lifespan.
How Often Should I Check Float Setting?
Check your float setting every 3 to 6 months. Regular inspections ensure proper water levels and prevent operational issues. Adjust if you notice salt bridging or overflow.
Conclusion
Setting the water softener float correctly keeps your system working well. It stops overflow and saves water. Regular checks help catch problems early. Adjust the float to match your water needs. This small step protects your home’s plumbing. Easy to do, important to remember.
Proper float settings mean soft water all year. Keep your system running smoothly and avoid costly repairs. Simple care leads to long-lasting benefits. Your water softener will thank you.