
Are hard water stains ruining your faucets and leaving your clothes dull? Installing a GE water softener could be the simple fix you need.
Imagine enjoying cleaner dishes, softer skin, and longer-lasting appliances—all from one easy upgrade. In this guide, you’ll discover how to install your GE water softener step-by-step, saving money and improving your home’s water quality. Keep reading to unlock the secret to softer, better water that makes every day feel a little easier.

Credit: whirlpoolwatersolutions.com
Choosing The Right Ge Water Softener
Choosing the right GE water softener is key to solving hard water issues. The right system protects your pipes, appliances, and skin. This choice depends on your home size, water hardness, and personal needs. Understanding the options helps you pick the best fit.
Types Of Ge Water Softeners
GE offers several types of water softeners. Traditional salt-based units are common. They use ion exchange to remove hardness minerals. Salt-free softeners reduce scale buildup without salt. Hybrid models combine both technologies for better results. Each type suits different water conditions and preferences.
Capacity And Size Considerations
Capacity depends on your household size and water use. Small families need smaller systems. Larger homes require bigger units with higher capacity. Check the grain capacity to match your water hardness level. A correctly sized softener works efficiently and saves salt and water.
Features And Technology
Modern GE softeners include smart features. Some have digital controls for easy programming. Others offer self-cleaning and regeneration cycles. Advanced models monitor water use to save resources. Features like demand-initiated regeneration reduce waste. Choose technology that fits your lifestyle and budget.

Credit: www.youtube.com
Preparing For Installation
Preparing for the installation of your GE water softener is important. It helps ensure the process goes smoothly. A good setup saves time and avoids mistakes. Gather everything needed before you start.
Tools And Materials Needed
Have basic plumbing tools ready. These include a pipe cutter, wrench, and screwdriver. Get Teflon tape for sealing connections. Prepare the water softener unit and any extra parts. Keep a bucket and towels nearby for spills.
Selecting The Installation Location
Pick a dry, level spot near your main water line. The location should be easy to access for maintenance. Avoid areas with direct sunlight or freezing temperatures. Make sure there is enough space around the unit. Check that it is close to a drain and electrical outlet.
Shutting Off Water Supply
Turn off the main water valve before starting. This stops water flow and prevents leaks. Open a faucet to drain remaining water from pipes. Check that no water flows through before cutting pipes. Safety first to avoid water damage and mess.
Step-by-step Installation Process
Installing a GE water softener is a clear, step-by-step process. This guide breaks down each stage to help you install your system smoothly. Follow these steps carefully to ensure your water softener works properly.
Removing Old Water Softener
Start by turning off the water supply to your old softener. Disconnect the power supply and any connected pipes. Carefully remove the old unit from its spot. Keep the area clean and ready for the new system.
Connecting Inlet And Outlet Pipes
Attach the inlet pipe to the water softener’s inlet valve. Connect the outlet pipe to the outlet valve on the softener. Tighten all connections to avoid leaks. Check that the pipes are aligned correctly for smooth water flow.
Setting Up Drain And Overflow
Install the drain line to the designated outlet on the softener. Secure the drain pipe to a proper drain or sink. Attach the overflow tube to prevent water spills. Make sure these lines are firmly fixed to avoid leaks.
Installing Bypass Valve
Place the bypass valve on the water softener’s inlet and outlet pipes. This valve lets you stop water flow to the softener if needed. Secure the valve tightly and test it by turning it on and off. Ensure it works smoothly without leaks.
Adding Salt And Initial Setup
Open the salt tank lid and add the recommended water softener salt. Fill the tank to the suggested level for best results. Plug in the softener and follow the manual to set the timer and regeneration cycle. Run the system through one full cycle before using water.
Programming Your Ge Water Softener
Programming your GE water softener helps it work best for your home. It controls how the softener treats hard water. Proper settings save salt and water. The right program keeps your water soft all the time. Below are key steps to set up your device correctly.
Setting Hardness Levels
Start by measuring your water’s hardness. Use a test kit or check local water reports. Enter this number into the softener’s control panel. This tells the system how much hardness to remove. Correct hardness settings stop scale buildup in pipes and appliances.
Adjusting Regeneration Cycle
The regeneration cycle cleans the softener’s resin beads. Set the cycle based on your water use and hardness. You can pick a time when water use is low, like at night. Adjust the frequency so the system uses salt efficiently and keeps working well.
Using Digital Controls
Most GE softeners have easy digital controls. Use the buttons to enter hardness and regeneration settings. The screen shows current status and alerts. Digital controls make programming fast and clear. Follow the manual steps to avoid errors in setup.
Maintenance Tips For Longevity
Proper maintenance keeps your GE water softener working well for years. Small tasks prevent big problems. Follow these simple tips to extend the life of your system. Regular care helps save money and avoids repairs.
Regular Salt Refills
Salt helps the water softener remove minerals. Check the salt level once a month. Add salt when it is low. Use high-quality salt made for water softeners. Avoid overfilling the tank. Keep the salt dry to stop clumping.
Cleaning The Resin Tank
The resin tank traps hard minerals from water. Clean it once a year to keep it working well. Use a resin cleaner made for water softeners. Follow the product instructions carefully. Cleaning removes buildup and improves water quality.
Checking For Leaks
Leaks waste water and damage your home. Look at all pipes and connections regularly. Tighten any loose fittings. Replace damaged parts fast. Early leak detection saves money and prevents bigger issues.
Troubleshooting Common Issues
Watch for signs like salty water or low water pressure. These show the system needs attention. Reset the system if it stops working. Clean the brine tank if salt bridges form. Call a professional if problems continue.

Credit: www.reddit.com
Benefits Of Proper Installation
Proper installation of a GE water softener brings many benefits. It ensures the system works at its best. This improves your water quality and protects your home appliances. A correct setup also saves money over time.
Improved Water Quality
Proper installation helps remove hard minerals from water effectively. Soft water feels smoother and tastes better. It prevents stains on sinks and bathtubs. You will notice cleaner dishes and softer clothes after washing.
Extended Appliance Lifespan
Hard water causes buildup inside appliances like dishwashers and water heaters. This buildup makes them work harder and wear out faster. A correctly installed water softener reduces this buildup. Your appliances last longer and need fewer repairs.
Cost Savings On Repairs
Hard water damages pipes and appliances over time. Repairing or replacing them costs a lot. A well-installed water softener cuts down on these issues. It lowers your repair bills and keeps your home running smoothly.
Frequently Asked Questions
What Are The Benefits Of Ge Water Softener Installation?
Installing a GE water softener reduces hard water effects like scale buildup. It improves water quality, protects appliances, and extends their lifespan. It also enhances soap efficiency and leaves skin feeling smoother.
How Long Does Ge Water Softener Installation Take?
GE water softener installation usually takes 2 to 4 hours. The exact time depends on your plumbing setup and system model. Professional installation ensures optimal performance and avoids future issues.
Can I Install A Ge Water Softener Myself?
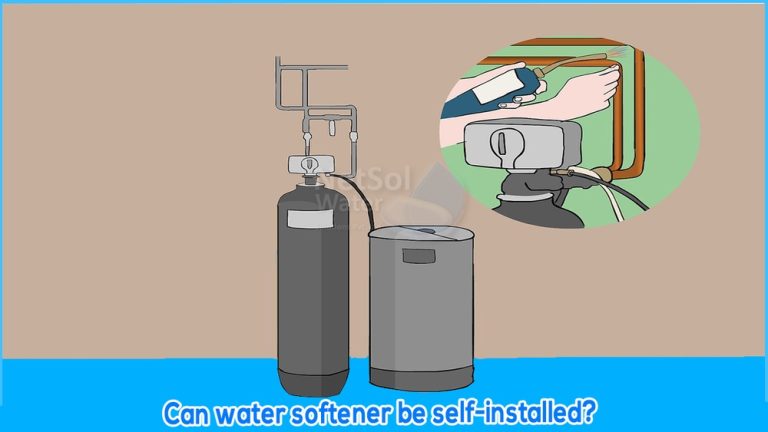
Yes, you can install a GE water softener yourself if you have basic plumbing skills. However, professional installation is recommended to ensure correct setup and warranty coverage.
How Often Should I Maintain A Ge Water Softener?
Maintenance is needed every 3 to 6 months. Check salt levels regularly and clean the brine tank as needed. Proper upkeep ensures efficient operation and longevity.
Conclusion
Installing a GE water softener improves your home’s water quality. It helps reduce hard water problems like stains and buildup. The process is simple and saves you money over time. Clean, soft water protects your pipes and appliances. You get better-tasting water for drinking and cooking.
Taking care of the system is easy with regular checks. Enjoy the benefits of smooth, soft water every day. A GE water softener is a smart choice for any household.