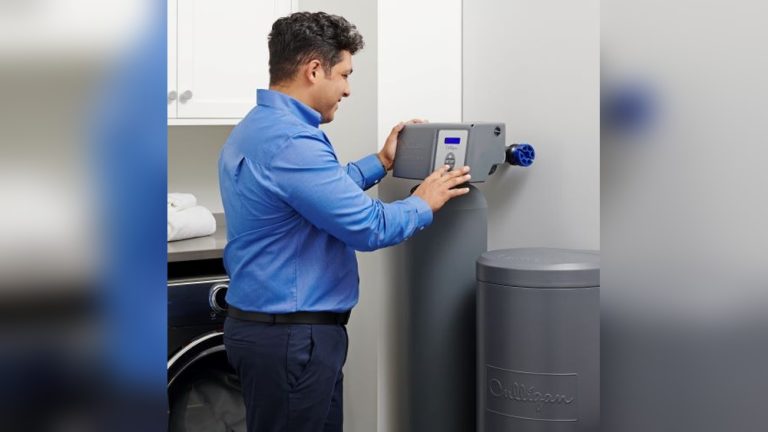

Are you tired of dealing with hard water stains and dry skin? Installing a water softener can change that for good.
But you might be wondering, “Can I install a water softener myself? ” The good news is, yes—you can! Imagine saving money on professional installation and gaining full control over the process. You’ll discover step-by-step guidance, helpful tips, and common pitfalls to avoid.
By the end, you’ll feel confident about tackling this project on your own and enjoy softer, cleaner water every day. Keep reading to find out how simple it can be!

Credit: www.thespruce.com
Benefits Of Installing A Water Softener
Installing a water softener brings many benefits to your home. It improves water quality and protects your pipes and appliances. Soft water feels better on your skin and hair. It also helps save money in the long run.
Improves Water Quality
Water softeners remove minerals that cause hardness. This makes the water gentler for washing and drinking. Soft water reduces spots on dishes and glassware. It also prevents soap from forming scum.
Protects Pipes And Appliances
Hard water causes buildup inside pipes and appliances. This buildup can lead to clogs and damage. Soft water stops mineral deposits from forming. It extends the life of water heaters, dishwashers, and washing machines.
Saves Money On Cleaning And Repairs
Soft water reduces the need for soaps and detergents. It helps clothes stay soft and colors bright. Less soap means lower cleaning costs. Soft water also lowers repair bills by preventing scale damage.
Better For Skin And Hair
Soft water feels smooth and clean on the skin. It prevents dryness and irritation. Hair washed in soft water becomes softer and shinier. Many people find it easier to rinse off soap and shampoo.
Credit: www.aquasolutionspa.net
Types Of Water Softeners
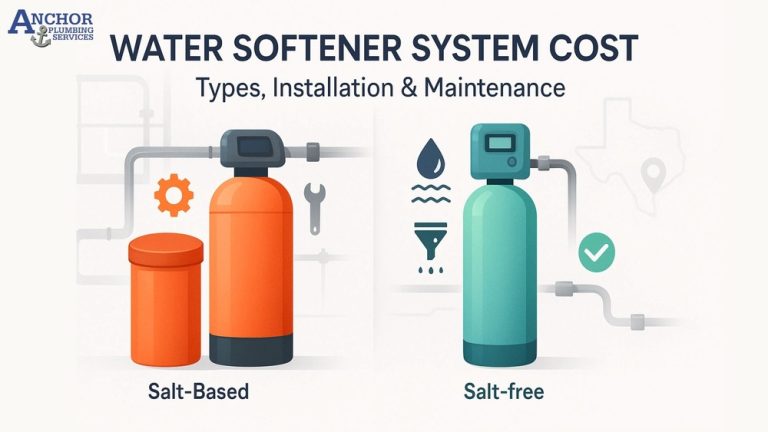
Water softeners come in different types. Each type works in a unique way to reduce hard minerals in water. Choosing the right one depends on your needs and home setup. Understanding these types helps you decide if you can install one yourself.
Salt-based Softeners
Salt-based softeners use salt to remove minerals like calcium and magnesium. They work by exchanging hard minerals with sodium. This type is very effective and common in many homes. Installation needs connecting to your water supply and power source. Regular salt refills are necessary to keep it working well.
Salt-free Softeners
Salt-free softeners do not use salt or chemicals. They change the structure of hard minerals so they do not stick to pipes. This type needs less maintenance and no salt refills. It is easier to install but less effective in very hard water areas. Good for people wanting an eco-friendly option.
Magnetic And Electronic Softeners
Magnetic and electronic softeners use magnets or electric fields to treat hard water. They alter mineral particles to stop scale build-up. These units are simple to install and use no chemicals. Effectiveness varies and depends on water hardness. They suit homes with mild hard water problems.
Tools And Materials Needed
Installing a water softener yourself saves money and gives control over the process. The right tools and materials make the job easier and faster. Prepare everything before starting for a smooth installation.
Basic Plumbing Tools
Wrenches are essential for tightening and loosening pipes. Use an adjustable wrench for various pipe sizes. Pipe cutters help to cut pipes cleanly. A pipe wrench offers a strong grip on larger pipes. Teflon tape seals pipe threads to prevent leaks.
Water Softener Kit Components
The kit includes the softener tank and resin tank. A brine tank holds salt for the softening process. Control valves manage water flow and regeneration cycles. Bypass valves allow maintenance without water shutoff. Tubing and fittings connect the system to your plumbing.
Additional Materials And Supplies
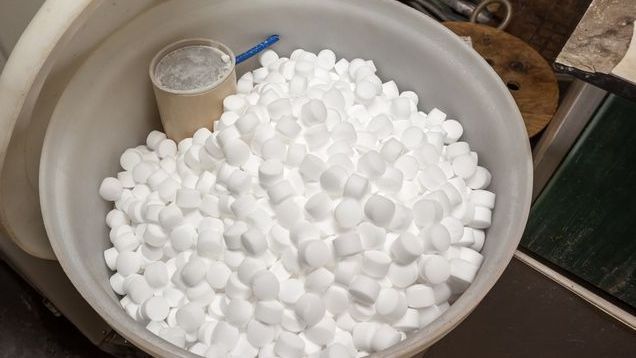
Salt pellets or crystals are needed for the brine tank. PVC or copper pipes connect the softener to your home plumbing. Pipe clamps secure pipes to walls or floors. Plumber’s putty or silicone helps seal fittings. A bucket and towels catch any water spills during work.
Preparing For Installation
Preparing for the installation of a water softener is an important step. It helps make the process smooth and safe. Taking time to get ready can save effort and avoid mistakes later.
Choosing The Right Location
Select a spot near your main water line. This makes the connection easier and more efficient. The area should be dry and have enough space for the unit. Avoid places with extreme temperatures or direct sunlight. Also, check for easy access to a power outlet for the softener’s control panel.
Shutting Off Water Supply
Turn off the main water valve before starting. This stops water flow and prevents leaks. Open a faucet to drain the pipes. This lowers water pressure and clears water from the system. Make sure all water sources are off during installation.
Gathering Necessary Tools
Prepare basic tools like a wrench, screwdriver, and tubing cutter. You may need plumber’s tape and pipe fittings too. Check the softener’s manual for any special tools required. Having everything ready speeds up the installation and avoids interruptions.
Step-by-step Installation Guide
Installing a water softener yourself can save money and give you control. Follow this step-by-step guide to make the process clear and simple. Each step builds on the last. Take your time and check your work.
Disconnecting Existing Plumbing
Turn off your main water supply. Open a faucet to drain water from pipes. Use a wrench to loosen and remove the pipe section where the softener will go. Keep a bucket nearby to catch any water left inside. Make sure the area is dry before moving on.
Installing The Bypass Valve
Attach the bypass valve to the water softener unit. This valve allows you to stop water flow to the softener without shutting off the whole house. Follow the instructions in your softener manual for correct placement. Tighten all connections firmly but avoid over-tightening.
Connecting Water Softener To Plumbing
Connect the softener’s inlet and outlet ports to your home’s plumbing. Use the correct fittings and pipe type. Ensure the inlet connects to the cold water pipe and the outlet returns softened water. Double-check all joints for tightness to prevent leaks.
Setting Up Drain Line
Attach the drain line to the softener’s drain outlet. Run the line to a nearby drain or utility sink. Secure the line to avoid kinks or clogs. The drain line removes water used during the softening process. Make sure it complies with local plumbing codes.
Adding Salt And Initializing System
Open the softener’s salt tank and add the recommended amount of salt. Use high-quality salt made for water softeners. Close the tank lid. Turn on the water supply and power up the unit. Follow the manual to set the system and start the regeneration cycle.
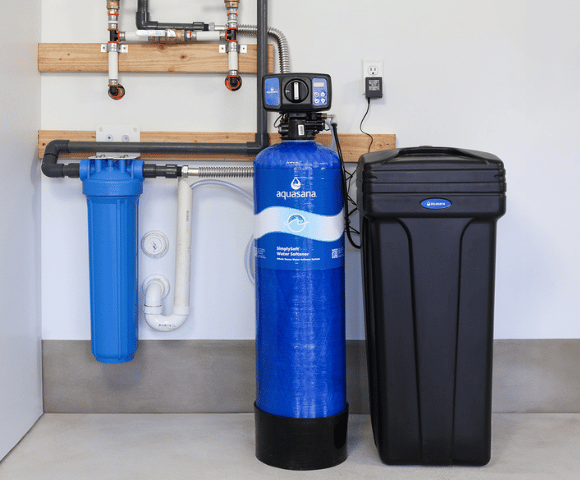
Credit: www.aquasana.com
Testing And Adjusting The Softener
Testing and adjusting your water softener is an important step after installation. This ensures the system works correctly and provides soft water. Proper testing helps avoid leaks and sets the softener for your water’s hardness level. Follow these steps to check and adjust your softener efficiently.
Checking For Leaks
Start by inspecting all connections and fittings. Look closely around the pipes and valves. Turn on the water and watch for drips or wet spots. Even small leaks can cause bigger problems later. Tighten any loose fittings carefully. Use a cloth to spot hidden leaks. Make sure the area stays dry after fixing.
Programming The Control Valve
The control valve manages the softener’s operation cycle. Set the time correctly to match your local time zone. Follow the manufacturer’s instructions to enter basic settings. This may include regeneration frequency and time. Programming the valve helps the softener work only when needed. This saves salt and water. Check that the display shows the correct time and mode.
Adjusting Hardness Settings
Measure your water hardness using a test strip or kit. Compare the test results with the softener’s settings. Adjust the hardness level on the control panel to match your test results. Setting it too low or high affects water quality. Proper adjustment reduces scale buildup in pipes and appliances. Test the water again after adjustments to confirm soft water output.
Maintenance Tips For Longevity
Maintaining a water softener is key to keeping it working well for years. Simple care steps help avoid problems and costly repairs. Regular attention ensures soft water flow without interruptions. Follow these easy tips to extend your water softener’s life.
Regular Salt Refills
Check the salt level in the brine tank once a month. Use high-quality salt to prevent buildup and clogs. Keep salt at least half full for efficient softening. Avoid overfilling, which can cause salt bridges and block water flow. Stir the salt gently if it hardens.
Cleaning The Resin Tank
Clean the resin tank once or twice a year to remove iron and sediment. Use a resin cleaner made for softeners, following package instructions carefully. This prevents resin beads from clogging and losing effectiveness. Clean tanks improve water softness and system performance.
Monitoring Water Quality
Test water hardness regularly to check softener performance. Use simple test strips or kits available online or in stores. Notice changes in water feel or spots on dishes as signs to test. Early detection helps fix issues before damage occurs. Keep records to track water quality trends.
Common Installation Challenges
Installing a water softener yourself can save money but comes with challenges. These common issues can slow down the process or cause errors. Knowing what to expect helps you prepare better. Below are some typical problems people face during installation.
Dealing With Plumbing Issues
Plumbing problems often arise during water softener installation. Pipes might not fit the system’s connectors. Some homes have old or corroded pipes that need extra care. Cutting into pipes can cause leaks if not done right. Tight spaces under sinks or near water heaters make work harder. Use proper tools and check for leaks after connecting.
Handling Drain Line Problems
The drain line removes waste water from the softener. Incorrect placement can cause water backflow or spills. The line must slope downward to flow freely. Some homes lack a nearby drain, requiring extra work. Clogs or blockages in the drain line can stop the system from working. Regular checks and cleaning keep the drain clear.
Troubleshooting Control Settings
Control settings manage when and how the softener works. Wrong settings can waste salt or water. Programming the timer and regeneration cycle can be confusing. Some models need manual input, others use digital controls. Reading the manual carefully prevents mistakes. Test the system after setup to ensure it runs smoothly.
When To Call A Professional
Installing a water softener can seem like a simple task. Some homeowners choose to do it themselves. But certain situations need expert help. Knowing when to call a professional saves time and avoids costly mistakes.
Complex Plumbing Systems
Older homes often have complicated plumbing. Pipes may be hard to access or fragile. A professional knows how to work safely with these systems. They avoid damage and ensure correct installation.
Electrical Connections Required
Some water softeners need wiring to power control valves. Incorrect electrical work can cause hazards. Licensed electricians handle wiring safely. This ensures your system works without risk.
Unclear Water Quality Issues
Water hardness varies by location. Sometimes other water problems exist. A pro tests water accurately and recommends the right system. This prevents buying the wrong softener.
Local Codes And Permits
Many areas require permits for plumbing changes. Professionals understand local rules and handle paperwork. This keeps your installation legal and up to code.
Lack Of Tools Or Experience
Installation needs special tools and skills. Without them, errors are common. Professionals bring the right tools and know-how. This leads to a smooth, lasting setup.
Conclusion
Installing a water softener yourself can save money and time. It requires basic plumbing skills and some tools. Follow the instructions carefully to avoid mistakes. Take your time and double-check each step. If you feel unsure, ask for help or hire a professional.
A proper installation ensures better water quality and appliance life. DIY can be rewarding but know your limits. Stay patient and focused throughout the process. Your home will benefit from softer water every day. Simple steps lead to great results.